Glitter Party Eye Look
Heya!! So here I have a tutorial for a glittery ‘party’ look. If
you have a night out or special occasion coming up, this is a cool one to do!
Below, I show you how to achieve it!...

The Video Tutorial:
The Products I Used:
NYX: Jumbo Eye Pencil in ‘Milk’
-
this base helps the highlighted areas to pop
Urban Decay: ‘Foxy’ eyeshadow (from the Naked Basics
palette)
-
this acts as a base colour under the glitter
Urban Decay: ‘Naked2’ eyeshadow (from the Naked Basics
palette)
-
this is the transitional colour, which helps the
crease colour fade out, up to the highlight
Urban Decay: ‘Faint’ eyeshadow (from the Naked Basics
palette)
-
this is my crease colour, which adds depth and
shadow to the eye
Too Faced: Shadow Insurance ‘Glitter Glue’
-
this helps the glitter stick onto the lid
LA Splash: ‘Pacific Sand’ glitter
-
this is the lid colour/glitter
Lorac: 3D Liquid Lustre
-
this highlights the inner corner of the eye
Fraulein38: Gel liner in ‘06’ (black)
-
this defines the lashline
Lorac: ‘Sable’ eyeshadow (from the Pro Palette)
-
this is the lower lash-line colour
Lorac: ‘Espresso’ eyeshadow (from the Pro Palette)
-
this adds darkness to my outer lower lashline
Generic Lash Curler
-
this helps lift up and curl the natural lashes
Collection: ‘Does It All’ mascara
-
this holds the curl, adds darkness, definition
and length to the natural lashes
Boots: ‘Natural Fan’ false lashes
-
these add volume and winged-length to the outer
half of the lashes
On The Rest Of My Face:
Benefit: Porefessional Primer
Kat Von D: Lock It Tattoo foundation in ‘M52’
Bourjois: Healthy Mix concealer in ‘53’
Mac: Studio Fix Powder in ‘NC30’
Seventeen: ‘Damson Wine’ Blush
Warm medium brown lipliner (no brand)
Collection: Cream Puff lip cream in ‘Angel Delight 4’
Tips For Trying This Look:
·
Get your crease colours as you want them before
applying the glitter adhesive to the lid. I went back in to touch up my crease
and found that the adhesive had gotten onto that area, and made my crease
colour patchy as I tried to blend.
·
Apply your face makeup after your eye makeup, or
have a tissue to hold under the eye, to catch fallout.
·
Have a tissue to hand to wipe the glitter off
your eyeliner brush as you work.
·
Lashes definitely finish off this look. I only
used a small pair to add some length at the corners, but I would also totally wear
this with bigger lashes.
The Finished Look:

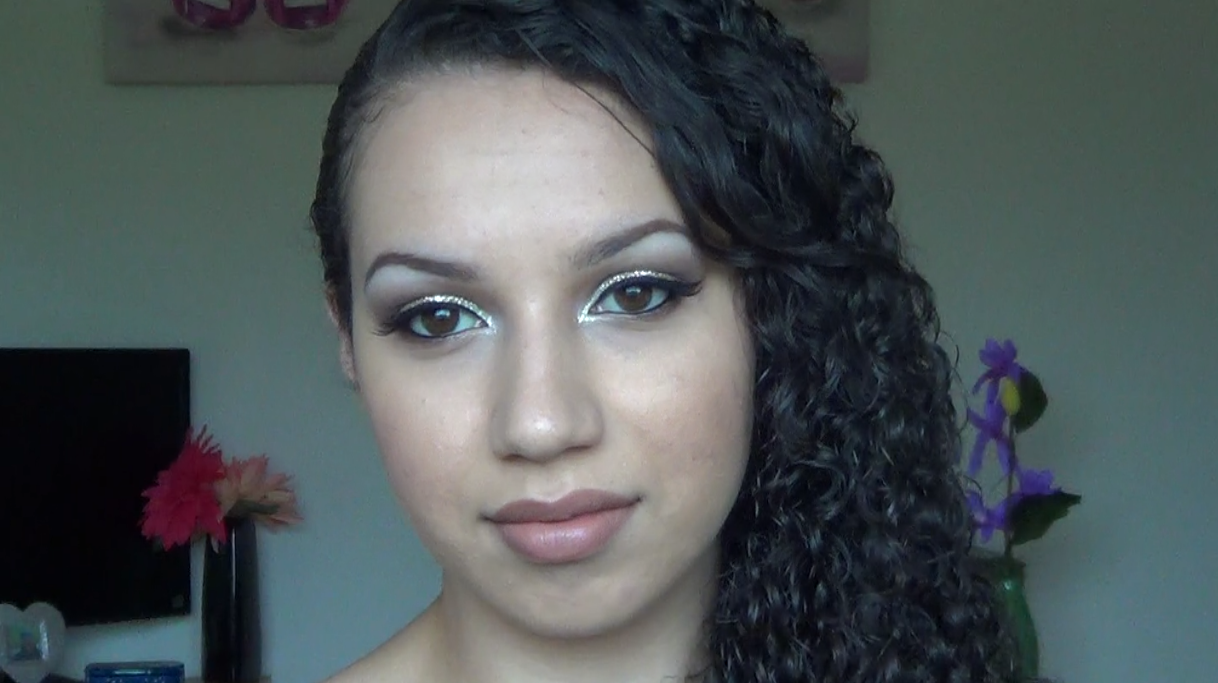


As I said at the beginning of the video, I did this
dramatic look as part of a ‘glam’ makeup to help boost my self esteem because
my skin is in crap!
I liked how it came out and it did the trick! I did my
hair, threw on a cool t-shirt, and felt much more confident leaving the house!
Below is the OOTD (outfit of the day) & FOTD (face of
the day) that I posted to Instagram & Twitter:

If you give this look a try, I’d love to see, so please
tag me on Instagram, Twitter or Facebook!
If you’re not following me on social media already, you
can do so here:
instagram.com/RealmOfMakeup
twitter.com/RealmOfMakeup
facebook.com/RealmOfMakeup
I hope you like the look and enjoyed the tutorial!
Thank you so so much for watching & reading!
Love always,
Kriss
x


Comments
Post a Comment